Outdoor Adventure Photography Sessions: What to Bring and How to Prepare
Most people think about wardrobe and a good hair day when they’re prepping for a portrait session. Adventure photography sessions require a completely different mindset. You’re hiking to a location, dealing with real weather, and working with natural light that waits for nobody. If you’re planning an adventure photography session with me anywhere in the Boulder area or up into the mountains, here’s what you actually need to know before we head out.
How Adventure Photography Sessions Differ From Studio Shoots
A studio session is controlled by design. Fixed lights, climate control, no mud on your boots. An adventure photography session is the opposite of that, and that’s exactly the point.
When we work together, we’re usually driving to a trailhead, hiking to a spot, and working within a specific window of natural light. Golden hour, which is roughly the first and last hour of sunlight, is where outdoor portrait work really comes alive. I plan sessions around that window, not around convenience.
The session itself involves movement between locations. We might walk a quarter mile between spots, stop, work the light, then keep going. That pacing is part of the experience. It’s not a backdrop swap like you’d see in a studio. The trail, the terrain, the way the wind is moving through the grass — those things are all part of what ends up in the photos.
Weather and trail conditions also shape what we do in real time. I’ve shot sessions at Chautauqua where the clouds rolled in fast and completely changed the mood. Sometimes that’s better. Sometimes we adjust. The point is that my adventure photography services are built around adapting to what’s actually happening, not fighting it.
Physical activity is part of the session. Not a hurdle to get past. The movement is what makes the images feel alive.
Fitness Level Considerations and Session Planning
I want to be clear here: adventure sessions aren’t just for people who run ultramarathons. They’re for anyone who wants to get outside and move. The difference is in the planning.
Colorado’s elevation runs from around 5,000 feet here in Boulder up past 14,000 feet in the high country. Even sessions at Chautauqua or the Flatirons sit above 5,400 feet, which is noticeable if you’ve just flown in from sea level or aren’t used to hiking at altitude. Elevation affects how quickly you get winded, and that’s just real information, not a warning.
Before we book a session, I always want to talk through fitness and comfort level. Not to gatekeep any locations, but to make sure we pick something that feels good and not miserable. If a longer alpine hike sounds like too much, there are shorter routes at Chautauqua that still get us into beautiful terrain without the climb. If you’re up for more, we can go further.
Morning sessions are my preference for this reason too. We’re not racing afternoon light or afternoon thunderstorms, and the pace can be a little slower. There’s no pressure to rush through something if we don’t need to. Early morning also tends to have fewer people on the trail, which matters for getting shots without strangers wandering through.
The conversation about fitness level is just part of the planning process, like talking about what to wear or where to meet. It helps me put together a session that actually works for you.
Essential Gear and Clothing Preparation
This is where people sometimes underestimate Colorado. Mountain temperatures can swing 20 degrees or more in a short stretch, especially at elevation. Layering is the answer, and it’s not negotiable if you want to be comfortable.
My general recommendation is a base layer to manage moisture, an insulating mid-layer like a fleece, and a weather-resistant outer shell you can stuff in a pack. You might not need all three at once. But you’ll want them available.
Footwear matters more than most people think. Trail-appropriate shoes with good ankle support and traction aren’t just about looking the part. They’re about not twisting an ankle on loose rock while we’re working. Sandals and dress shoes have both shown up at trailheads. Please don’t do that.
Pack water and a snack. Sessions that involve hiking can run two to three hours, and sustained energy keeps you looking like yourself and not like you’re about to pass out. Sun protection is also worth thinking about: sunscreen, a hat, sunglasses. The UV exposure at altitude is higher than most people expect.
On the clothing side, keep jewelry simple and avoid super bright or highly patterned pieces that fight with the landscape. You don’t need to wear neutrals exclusively, but think about what’s going to work with the background rather than against it.
Understanding Weather and Seasonal Timing
I’m not going to pretend I can predict Colorado weather. Nobody can. What I can do is build sessions around the patterns that generally hold.
May through September tends to offer the most stable conditions for mountain sessions, including places like Rocky Mountain National Park. Mornings are almost always more reliable than afternoons. Colorado’s classic afternoon thunderstorm pattern is real, and it’s a genuine reason to schedule early rather than starting at noon.
Golden hour is my favorite time to shoot outdoors. The light is warm, directional, and forgiving in ways that midday sun just isn’t. For evening sessions, that means we’re usually wrapping up right at or just after sunset. For morning sessions, we’re often starting before most people are awake.
I always build flexibility into adventure session planning. If conditions shift or a location isn’t working, we adapt. I’ve been shooting outdoors in Colorado long enough to know that the best images sometimes come out of moments I didn’t fully plan for.
Backup plans are part of the process. We talk through those options when we’re planning, not when we’re already standing at a trailhead in a downpour.
Choosing Your Adventure Photography Location
Location choice is one of the most important parts of planning, and it’s a conversation, not a one-size-fits-all decision. You can explore specific Colorado photography locations in more detail, but here’s how I think about the main spots.
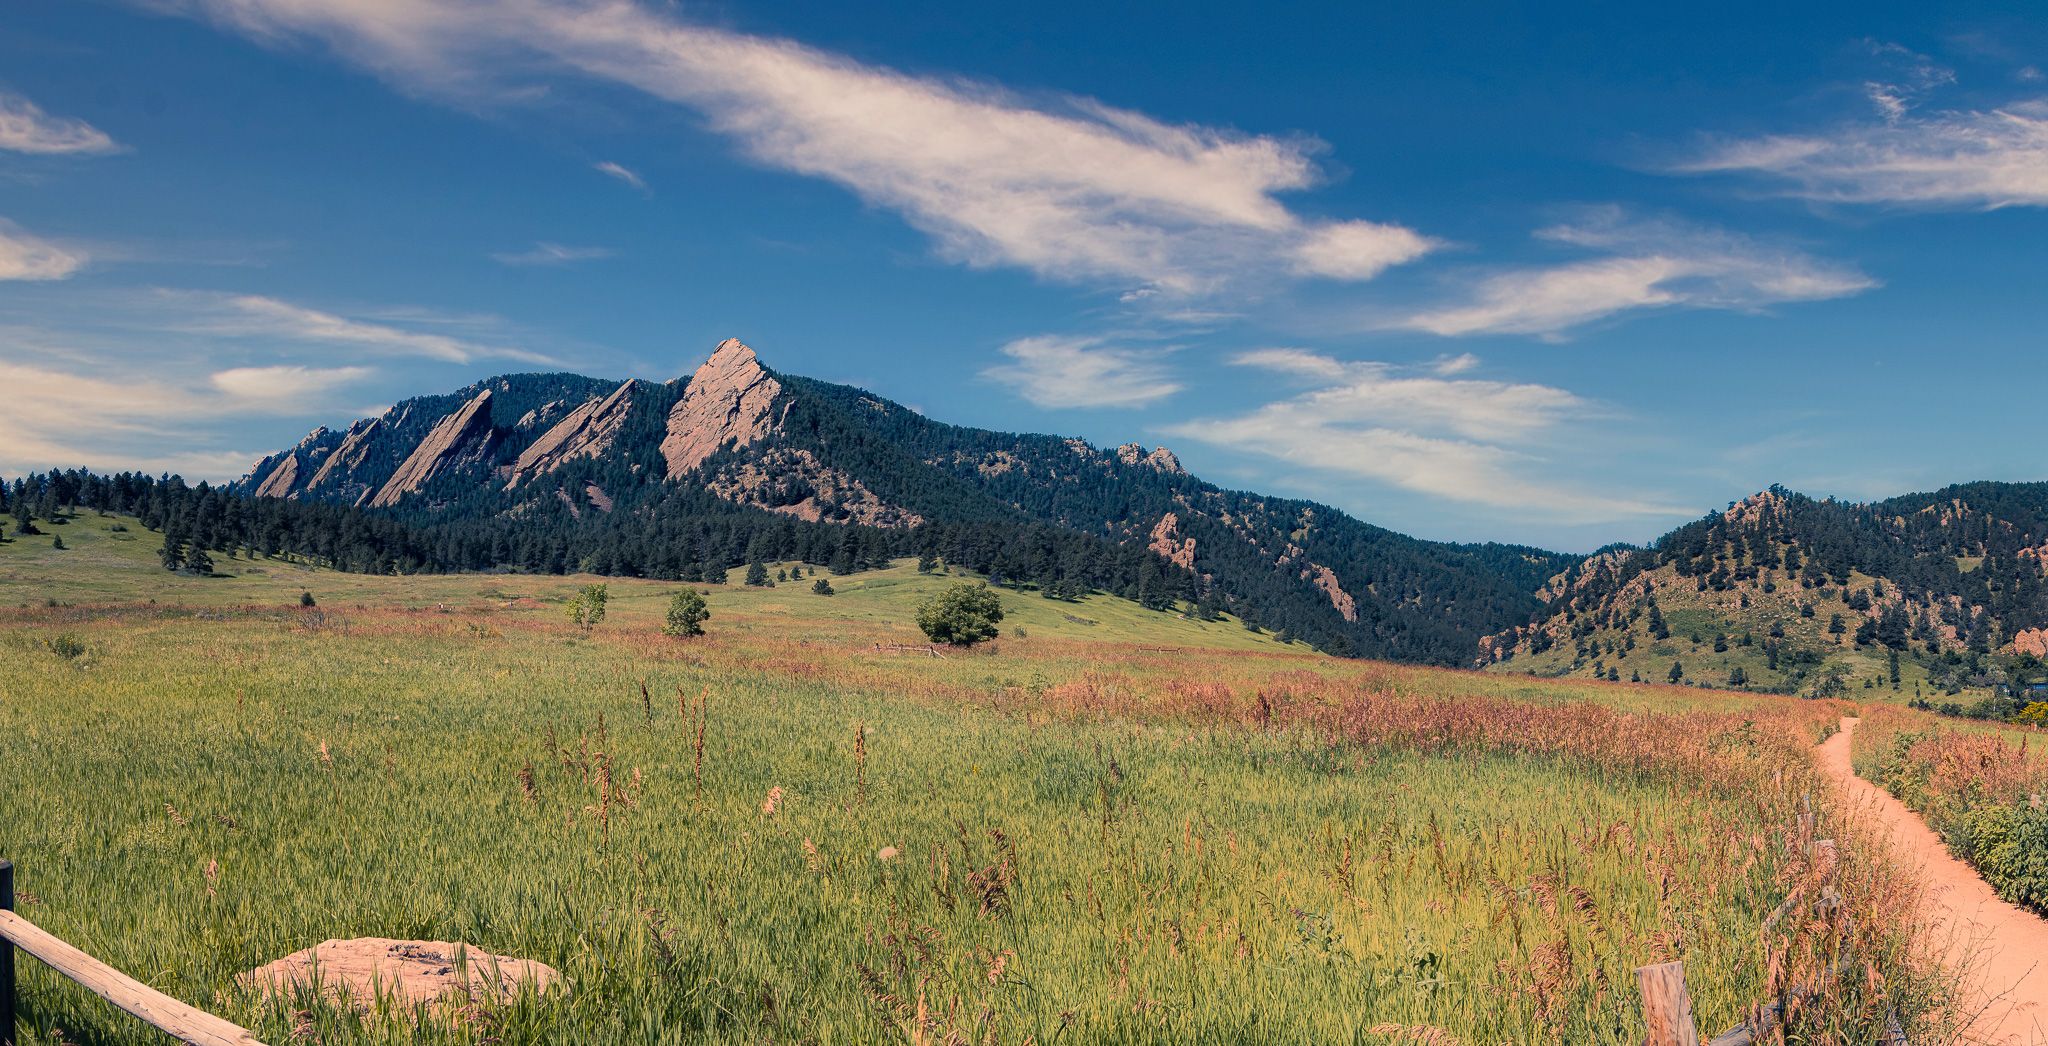
Chautauqua Park is my most-used location for adventure portrait sessions and family sessions that include a hiking element. It’s accessible, parking is free, and there’s enough variety in terrain and elevation to give us multiple looks in a single session. The Flatirons in the background don’t hurt either. I’ve shot dozens of sessions here, and the light in the morning along the Mesa Trail is consistently excellent.
The Flatirons offer more dramatic backdrops and a little more technical terrain. Multiple trail options mean we can dial in the difficulty based on your comfort level. The rock formations create natural framing that you just don’t find in a park or field setting. This location works particularly well for couples adventure photography and portrait-focused sessions where the landscape is meant to be a main character.
Rocky Mountain National Park is for sessions where we want genuine alpine terrain. The elevation runs from around 8,000 feet at the park entrance up to 12,000 feet and beyond on some trails, so acclimatization is worth discussing before we plan anything there. It requires an entrance fee and a little more logistical planning, but the payoff for full-day adventure sessions is real.
We figure out the right location together based on your fitness, the time you have available, and what you want the images to feel like.
Before You Book: A Quick Checklist
Here’s what I’d want every client to be thinking about before we talk:
- Layers: Base layer, mid-layer, weatherproof shell
- Footwear: Trail shoes with ankle support and traction
- Sun protection: Sunscreen, hat, sunglasses
- Hydration and snacks: Water plus something to keep your energy up
- Timing: Early morning sessions are almost always the move
- Fitness conversation: Be honest about what feels comfortable so we can plan accordingly
Planning an adventure session doesn’t have to be complicated. It just takes a different kind of preparation than showing up to a studio. If you’re ready to get outside and make something real, reach out and let’s start talking about where we’re going and what we’re doing when we get there.